Saturday 27 April 2013

Pizza ....wait for it.... Poppers

So, when I was in baby shower planning mode, I also decided that some home made party food would be fun to serve.  I showed you my Caprese pop recipe earlier this week, and today's post is about Pepperoni Pizza Poppers! I was inspired by the idea of Jalapeno poppers.  (They were a no-go,, because I was afraid some of the older British ladies might scoff at anything spicier than a potato).  First, I tried a deep fried pizza popper recipe, and it was tasty.  Pepperoni? Good.  Mozarella? Good.  Deep fried? Goooood. Unfortunately, I just didn't think it was presentable enough to serve to guests, so after eating 3 1 of those for quality control purposes, I moved on to a new approach.

I decided to make them like mini calzones....it was pretty simple once I got the hang of dealing with the dough......lightly floured surface?  Yeah right.....try lots and lots of flour everywhere to prevent the dough from turning into a sticky mess.

Here's what you'll need:
Since I'm no dough expert, so I opted for a "just add water" pizza dough mix, which was really easy.  I could have made the sauce from scratch....but I didn't have time (I knew I would be cleaning my kitchen for weeks to get rid of all the flour! ;-)

Ingredients: 
1 pizza base mix
1/2 jar pasta sauce (and 1/2 jar to serve)
1 pack mini mozarella
1/2 pack pepperoni
2 Tbsp parmesan cheese
Medium Biscuit Cutters
Fresh Basil to serve
Makes 20

Method:

1.Preheat oven to 180°C  (375°F)
2. Prepare toppings.... I just cut up the pepperoni and mozarella like so.
 3. Prepare pizza dough according to package instructions (or from scratch if you have the time for that sort of thing...who can wait for a whole HOUR for dough to rise?!)
4. Knead the dough and roll out on a WELL floured surface.
     5. Use a biscuit cutter to cut the dough into as many circles as you can.  Hints: My biscuit cutter was about 2" in diameter...next time I would use a larger one to keep the sauce from squidging out of the sides.  Also, you can combine the "scrap" pieces of dough into a ball and roll it out again to get more circles.
    6. Put a piece of parchment paper onto a pizza stone or baking tray, brush with olive oil, and sprinkle with parmesan cheese. Place the pizza dough circles onto the paper.
     6. Spoon about 1 1/4 tsp sauce onto each circle and add toppings.
     7. Fold the dough over and pinch it together around the edge.
     8. Brush with mozarella and sprinkle with remaining parmesan cheese.
     9. Bake for 15 minutes or until golden brown, and serve with basil garnish and the remaining sauce for dipping.

    Yum yum!

    Cute, right? Do you have any fun recipes for serving pizza as a party food? 

    Happy Weekend, Everybody!

    ...and happy early Birthday (and Christmas...and next birthday...and next Christmas) to me!

    I've been playing with my new "toy"....  Any guesses what it might be?

    What about now?? Here's a little peak of Elijah checking it out...
     

    And tasting part of it....
    .
     If you guessed that it's a Canon DSLR, then you win £50!**  Now, if you can guess what model it is, I'll be really impressed!  Though, I doubt anyone would guess from these photos. My photography skills are dusty, and I've never really worked with a DSLR. I took photography back in high school for a year or two in the "good old days" when hanging out in a darkroom was a requirement for admittance into the inner circle of photographic geniuses. I've got a pretty steep learning curve ahead as I explore what this bad boy can do!  I'm determined not to leave the dial set to "Auto" too often, and really work on mastering the more artistic capabilities of the camera. I hope you all think Elijah is as cute as I do, because you will probably be seeing a lot more of him around here.  As a self-proclaimed perfectionist, I take issue with sharing too many grainy iPhone photos....but crystal clear photos from my new camera? I think I'm okay with sharing those.

    Do any of you have a DSLR? What are your go to settings? Any tips for a DSLR novice?!

    **Joke's on you...even though we got a good deal on a used one on eBay, we've already spent the "prize  money" a few times over on the camera.


    Tuesday 23 April 2013

    Caprese Pops

    I recently posted about the shower we threw for my friend, Heather.  If you remember, the theme was "Ready to Pop".  My friend Jess came up with the theme, inspired by Popcorn.  Of course, I couldn't stop there once these creative wheels of mine got turning.  I'm no whizz in the baking department, but I have always loved the ideas of cake pops. However, I was in charge of savoury foods for the shower.  Then, I remembered that a while back at my Weight Watchers meeting (oh the irony), they were plugging their cake pop kit which also included some savoury "cake" pop recipes.  This got me thinking, how could I wrap up the cake pop cuteness in a savoury package.  Then it came to me.....


    Pesto "cake".  On a stick. With mozarella. And?  You guessed it....basil!  Watch out world!  CAPRESE SALAD JUST GOT CRAZY!
    Here's what you'll need:
    I was making a double batch- that's why there are two eggs shown here!
    For the pesto"cake":
    50g self raising flower
    20g margerine
    salt
    pepper
    5 teaspoons green pesto
    1 medium egg, beaten
    1 tablespoon plain greek yoghurt
    Cake pop mold (or mini muffin tin)
    To serve:
    1 package of fresh, mini mozarella cheese
    1 pack of on the vine cherry tomatoes
    1 small bunch of fresh basil
    Remainder of green pesto
    20 cake pop sticks
    Makes 20 Caprese Pops!
    1. Preheat the oven to 180° C (375°F)
    2. Beat the egg in a small bowl and set aside
    3. Sift the flour into a large bowl. 
    4. Add the egg to the flour and mix. 
    5. Add the remainder of the ingredients (salt, pepper, greek yoghurt, and pesto) and mix well
    6. Spoon the mixture into the cake pop mold
    7.  Replace the lid, and bake for 16 minutes
    8. Allow to cool completely before removing from the mold.  
    9. Cut the cake pops in half. (I'm no baking expert, so mine did not come out as perfect spheres.  I discarded the wobbly top bit, and just used the pretty rounded bit from the bottom of the mould.)
    10. Wash the cherry tomatoes and set to one side to drain.
    11. Cut the mini mozarellas in half the same way you did with the pesto cake
    12. Assemble the Caprese Pops:  Tomato first (on the bottom), then mozarella, then the dome shaped pesto "cake" on top....and voila!  You now have Caprese POPS!
    Serve with basil garnish, and extra pesto for dipping. (or you could also serve with oil/balsamic...mmm.. that would be tasty!).

    Are you into the whole "cake pop" craze?! What are your favourite cake pop recipes?

    Saturday 20 April 2013

    Ready to POP- A Baby Shower Story

    Last night, I helped throw a baby shower for my good friend Heather.  You all know the drill: Offer to help throw baby shower.  Look at decorations for baby shower.  Decide you could make cuter ones that are cheaper than the ones you can buy. Go all out and hand make everything at the last minute the week before the shower. No?  Just me?  Oh well...that's how things tend to go around here.... (Hold on to your hats, folks, this is a long one!)
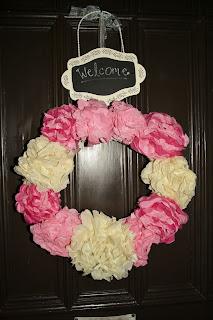
    DIYed tissue paper flower wreath for the door
    Let me tell you, we had so much FUN getting everything ready for this shower! Jess, Laurie, and I had a great time decorating yesterday. Laurie had great ideas about how to arrange the flowers and the tables, and came up with the idea of using the piano as a feature table (genius!).  Jess was a decoration arranging/hanging machine.  I was in and out a bit looking after Elijah (we had to steal a diaper from the middle of the diaper cake for a poomergency...), so I feel these two ladies did most of the hard work.  But, it was really fun putting this together with them!

    It all started when I made a little doily bunting.....Then, there may or may not have been more bunting.....And a few  a bunch of tissue paper flowers and pom-poms. (hey...it was a big room to decorate!)

    Jess had a really cute idea for a theme: Ready to Pop!  We really rolled with that. I DIY'ed a chalkboard sign for a little feature table (and, of course, we stuck a tissue paper flower on that).  There were some little yellow, pink and white sweets in a jar, and a picture of mommy & daddy to be, and an ultrasound photo of baby.

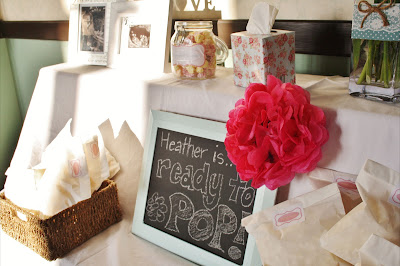
    POPcorn table (Piano covered in a sheet!)
    We had a variety of vases and jars, which Jess wrapped in different fabrics, ribbons, and lace that went with the theme!  Some of them displayed flowers on small tables around the room, and some of them had hard candy in them.

    We arranged the tables in a T shape, with the savoury food table at the back.  This table had lots of food items that fit the theme : Mini POPpadoms, POPcorn Chicken, and my very own recipe creations: Caprese POPs, and Pepperoni Pizza POPpers! I designed the labels...Of course the food had to be labelled! (Are you throwing a baby shower this spring/summer?  Click on the colour you need for my very first free printables! BLUE, PINKYELLOW versions and  available.) 

    Food tables


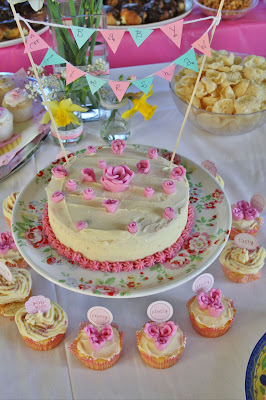
    Cake and Cupcakes by Jess- Amazing, right?!
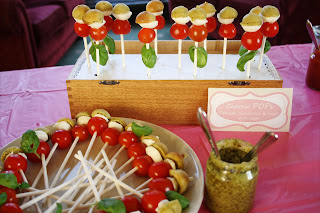
    Caprese POPs (recipe post to follow later this week! :)
    The gift table featured a diaper cake made by Jess, and there was also a pot for people to contribute towards the purchase of a mattress for baby E, since all of the other major items were already taken care of.
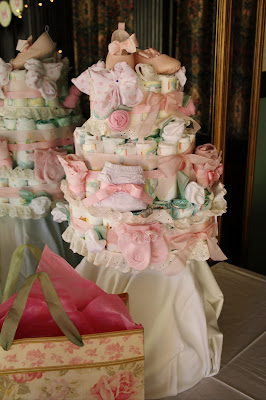
    So beautiful, right?!
    Laurie was in charge of the games, and we played Advice for Mummy MadLibs...It was so cute and funny! (E.G. giving David Beckahm advice about giving birth to a chimney that will be skiing several times a day...HA!) We also had a little blindfolded diaper changing race at the end.

    My favourite part of the whole thing, was blessing my sweet friend Heather.  She has such a sweet heart, and there are a lot of people who really love her here, so it was fun to share the evening celebrating the fact that she is about to be a mommy!  (It makes me tear up a little thinking about it... love you, Heather!!) Also, baby showers are a fairly recent development in the U.K., so it was fun to show a lot of the guests what a baby shower is all about!
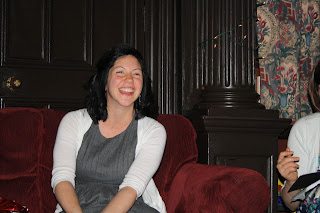
    Seriously...how beautiful is this Mama to be?!
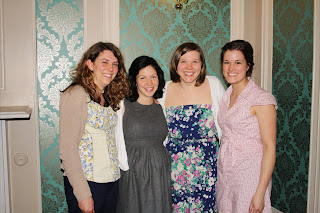
    Laurie, Heather, Me & Jess
    Have you planned a baby shower for any of your friends?  What was your favourite part??

    Monday 15 April 2013

    2013 Big Clean- A Happy Ending (for now)

    Well, my house may not be as sparkly and shiny as it was going to be (in my dreams), but I'll tell you what:  we are de-cluttered.  It is nearly impossible to clean to the standard that I would like when there is a very curious (and very mobile) baby trying to help all the time.  Then again, why would I want to clean when I could just play with said curious baby instead?
    I mean...seriously. How cute is this kid?
     The main living area, kitchen, and master bedroom and Eli's room got a really good clean, and it feels so great to have gotten rid of all of the stuff that was sitting around just taking up space.  It's like all that junk was clouding my ability to be creative.  And, I'll tell you what, there is a LOT of creativity happening over here recently. I figure that I can clean at any point in time, but this creative wave may only last for a period, so I should probably make the most of it.   Eventually, I'll get around to posting some before and after pictures of the crazy organization that took place, but for now, I shall say goodbye to the 2013 Big Clean.  It's been refreshing, and I'll look forward to next year's reunion.
    Buh-bye Junk! I won't miss you at all! 


    Have you finished your Big Clean? Did you get everything done that you wanted?  Or, like me, did you realize that sometimes "good enough" really is good enough?

     Now, it's baby shower central at casa de Wightman. Watch this space for a post about a totally Pinspired baby shower for my dear friend, Heather! 

    Wednesday 10 April 2013

    The Best Thing About Stretch Marks

    I recently "took a break" from the Big Clean, and did something that I have been really dreading since becoming a Mom......(cue Psycho theme tune here).... bathing suit shopping .  Even though I've lost quite a bit of weight after having Eli, I still have the tell tale stretch marks running across my belly, so I decided to look for a one piece bathing suit.  Luckily, the experience didn't leave me wanting to crawl into a dark whole and hide until summer was over. In fact, I even relished the little shopping trip. It felt like some sort of right of passage....  I was going to be a sexy mom!  I was going to buy a classy, elegant one piece to wear with my big floppy hat and sunglasses while we are pretending it's warm basking in the sunshine down in Somerset this summer. You know what?  I totally bought one...I got a gorgeous bathing suit that I just adore, and the stretch marks were the perfect excuse to buy it.  Afterwards, I caught myself thinking, "This is the best part about stretch marks!" 

    Then, I did a mental double take.  The best part? Huh.  I'd never really thought of my stretch marks as a positive thing until now.  After that, I took a moment to reflect on what stretch marks mean.  Ultimately, stretch marks are proof and representation of growth.  The best thing about stretch marks could be that they tell the story of our family. They remind me that physical perfection is not my number 1 priority (not. even. close.).  They tell me that my husband loves me both in spite of and because of these stretch marks.  They represent a changed marriage, and a more complete family.  They shout out how lucky I am to have had the opportunity to carry and give birth to a child, when there are women out there who would do anything for their own stretch marks. But, what is the very best thing about stretch marks? It is that they remind me of God's grace, and that I have been immeasurably blessed by the two men I get to share this life with. 

    Now, I know this isn't a new idea. People say stretch marks are battle scars, (which is a bit of intense phrasing for my taste). I guess the other day was just my "A-ha!" moment, when I realised that stretch marks are a gift, and a reminder that I should never take the people I love for granted.  So, for all you women out there with stretch marks, I hope you have your own "A-ha!" moment, and that you cherish the beautiful little (or big) stories that those stretch marks tell. 

    This is not my tummy (or my tan).  Image Source

    Tuesday 9 April 2013

    Big Clean: E-bay Selling Tips and Tricks

    So, this post for those of you who have never ventured to sell anything on eBay.  I hadn't either until a couple of weeks ago. We made about £40 from the stuff we sold on eBay after postage and packaging.  We also sold some of our old CD's and DVD's to Music Magpie and got about £20. Bonus! So, I would definitely do it again, but I'd use some of the knowledge I gained from my first sales.  

    (photo credit: marketingweek.co.uk)
    Here are my tips for selling multiple items at one time on eBay while getting organized for the Big Clean:
    1. Before listing your stuff, make sure you work out what your postage costs will be. I didn't do this and ended up paying about £10 more than I charged people. Duh, right?
    2. Make sure your auctions start/end around the same time.
    3. Make sure you have the packaging you need for all of your items.  I didn't do this and ended up running around like a headless chicken on the day I was shipping all the stuff!
    4. As soon as you have a bid on an item, place the item in the package. Then, label the outside with some masking tape so that you know what it is.  That way, as soon as the auction ends, you can just stick a copy of the buyers invoice in the package, tape it up, and label it with the address of the winning bidder. Easy peasy!
    5. Aim for your auction to end sometime in the evening.  This way, you can make one trip to the post office towards the end of the following business day.  I sold about 8-9 items, and ended up making 3-4 trips to the post office.  What a waste of time!
     Use that money to buy some fun stuff to help you get organized! Or a new purse.  Or shoes.  Or wine.  Whatever. ;-)


    Saturday 6 April 2013

    The Organization Station (The Big Clean-Part 2)

    When I begin my spring cleaning, I find that it helps if I have a system.  Otherwise, my mind tries to go in a gazillion different directions at once.  This year, I've been utilising an "organization station" to try to help me focus and de-clutter as I go.  Here's how it works: you will need four laundry baskets (or bags, or boxes....some sort of receptacle for accumulating things):

    1) Donate
    2) Sell
    3) Sort
    4)Throw away

    Place items into the various categories as you carry out the organization portion of the Big Clean.  Once you have finished a room, take the items to the master "organization station", where you can combine items from every room. You could also put things directly where they belong if you have already organized the place where they live. Here is what my "Organization Station" looks like (and probably will for the next month...)

    It's not pretty, but you get the idea!
     Clothing items that you are getting rid of should be sorted into donate and sell piles.  Donate the items that have been well loved, and sell the stuff that your mom/friend/sister talked you into buying and you have worn twice or never worn.  Once you have finished organizing (or, when you feel like you need a break), and you have a good sized pile of things to "sell", and about an hour.  Take a few photos, list them on eBay, and move on.  After your eBay auctions end, anything that hasn't sold on will also be donated. (There will be a mini-post next week with some tips on selling stuff on eBay as you organize if you haven't ever done it before!) You're not losing anything by not selling them, but it won't hurt to have a little extra money in your pocket.

    The final basket is for things to "sort".  The trick here is to keep on top of this throughout the day.  As misplaced items from one room end up in the basket, take them with you when you make a trip to the room where they do belong. This way, you should be able to keep on top of these items throughout the day.  To be honest, I haven't been very good about keeping on top of this so far.  I figure that once I have a room in tip top shape, I can take take a quick look through the "sort" basket, then take items to their newly organized home!

    You can either let "throw away" items build up throughout the day month long process (resulting in a few triumphant and rewarding trips to the bin at the end of the Big Clean), or you can throw away as you go.  I think I'll just wait and do it all at once so that I can really fathom how much crap we have accumulated since we moved here. Also it probably won't all fit in our outside bin, so I will have to take it to a larger one somewhere else.  (I haven't properly sorted through all of our stuff since we moved here two and a half years ago....oops!).  I am being ruthless this year.  I try to keep things relatively clutter free....but at times it's difficult to silence my inner pack rat.  "You might need this one day.....as soon as you throw it away, you will be looking for it".  Enough, I say!  Enough!  If I haven't needed it in over 2 (or more) years, chances are I won't need it tomorrow. Or the next day.

    This is all the trash....from upstairs.
    So...there it is: The Organization Station, and a few helpful tips for getting organized as you go!  


    Tuesday 2 April 2013

    Life Lessons: The Best Laid Plans....

    Well, the next post was supposed to be coming to you from my fresh and squeaky clean home.  Instead, it comes from a wiped out Mama. I am, by no means, caught up on laundry.  (How could any human being do this when you have to change your sick baby's clothes 4 times a day?) A good friend had offered to babysit Elijah for the whole day, and  I was going to carry on with the Big Clean after a nice, long weekend of family time. However, a sick little boy means that all these plans are to be put on hold for today. 

    Fortunately, as I have pointed out before, I have a higher calling in life than to have a home that is freshly cleaned and organized.  My calling is to have a home that is filled with love.  To rely on Jesus to give me the strength to care for my husband and son to the best of my ability.  I'm using all His strength today, because mine seems to have vanished into thin air (along with all of Elijah's clean clothes).  So, today, as I eat a chocolate bar and drink two very large cups of coffee for breakfast (at 11:00), I'm thankful for sweatpants.  And also, I'm thankful that I have the chance to stay home and snuggle my little boy, who just needs to be with Mummy today. 

    Don't worry.  I'll be back into Martha Stewart Beast Mode in no time.


    ShareThis